

Earlier this year, I found myself struggling to catch spelling mistakes and polish my writing. I wanted my work to look clean and professional, but checking everything by hand was too slow.
So, I started testing AI spell checkers to see if any of them could actually help.
Over the past few months, I’ve tried dozens of tools while writing blogs, emails, and reports.
In this blog, I’m sharing the 15 best AI spell checkers I’ve tested in 2025. These are the ones that caught real mistakes, worked fast, and were easy to use.
Here’s what I looked for:
- Catches common spelling and grammar mistakes
- Simple and quick to use
- Includes a “fix-all” button
- Offers a generous word limit
- Supports multiple languages
So, let’s dive in!
Table of Contents
What are AI Spell Checkers?
I was proofreading a blog post late at night. I was too tired to spot small typos, so I pasted the text into an AI spell checker to help out.
In just a few seconds, it highlighted all the spelling mistakes I missed. That’s the main job of an AI spell checker.
It doesn’t write your content for you. It just checks what you’ve written and helps clean it up.
It looks at your words and offers accurate suggestions based on context.
For me, it’s like having a proofreader on call, ready to help anytime I need it.
At a Glance: Top AI Spell Checkers
| Tools | Fix-All Button | Word Limit | Language Support |
|---|---|---|---|
| Scribbr | Yes | None | Yes |
| QuillBot | Yes | None | Yes |
| PaperRater | Yes | None | Yes |
| SpinBot | Yes | None | Yes |
| NeuroSpell | Automatic | None | Yes |
| Wordvice | Yes | 500 words | Yes |
| Hix | Yes | 150 words | No |
| Scribens | No | None | Yes |
| Corrector | No | 15,000 characters | Yes |
| LanguageTool | No | 2000 characters | Yes |
| Trinka | No | 500 words | 2 options only |
| Grammarly | No | None | No |
| ProWritingAid | No | None | No |
| Sapling | No | None | No |
| ZeroGPT | No | 1000 words | No |
How I Tested These AI Spell Checkers
To find out which AI spell checkers are truly worth using, I put each one through the same hands-on test.
I started with a short piece of text containing a mix of spelling mistakes, grammar errors, and tricky word choices.
I ran that exact sample through every tool to keep things fair and consistent.
I evaluated how accurately each checker spotted and corrected the errors, how natural the suggestions sounded, and whether the meaning stayed intact.
I also tested how “free” the free versions really were.
Some tools allowed generous usage without an account, while others limited features behind paywalls or signups.
Spell checkers were rated on:
- Accuracy with spelling and grammar
- Ease of use
- One-click fix option
- Word limit
- Language support
How Do You Choose The Best AI Spell Checkers?
I didn’t just want a tool that fixed typos. I wanted something that genuinely improved my writing. So, I tested a wide range of AI spell checkers to see which ones actually delivered.
I looked at how much I could do for free, and which tools offered helpful extras beyond basic spell-checking.
Here’s what I focused on during testing:
Accuracy with Spelling and Grammar
The best tools didn’t just catch typos; they flagged grammar issues, confusing wording, and even context-specific mistakes.
Ease of Use
I looked for clean interfaces, fast results, and features that didn’t require a learning curve.
One-Click Fix Option
A simple “fix all” button saved time, especially when reviewing longer texts.
Word Limit
Some tools let me check full articles without limits. Others stopped me halfway unless I upgraded.
Language Support
Multilingual support was a big plus. I tested tools in both English and other commonly used languages to see how well they performed.
The Best 15 AI Spell Checkers (Ranked)
I spent hours testing AI spell checkers. I tried every tool I could find. These 15 were the best of the bunch:
1. Scribbr
I tried Scribbr’s AI Text Summarizer while working on a long blog post. I was curious to see how well it would do.
To begin, Scribbr supported 4 languages: English, French, German, and Spanish. I liked that I could choose the type of English too — American, British, Australian, or Canadian.
The editor felt smooth and simple. I could format my text with headings, bold, italics, and bullet points using the toolbar.
What really stood out was that I didn’t have to use a browser. I downloaded the Windows app and opened it right on my desktop.
I pasted a 784-word text, and it instantly showed all the mistakes.
After a click of a button, all the spelling issues were gone. It felt quick and easy.
Limitation: None.
This is what I did step by step:
Step 1: I visited Scribbr AI Spell Checker.
Step 2: All I did was paste a 784-word text in the box, and all the mistakes were highlighted immediately.
Then, I just clicked the button Fix all errors.
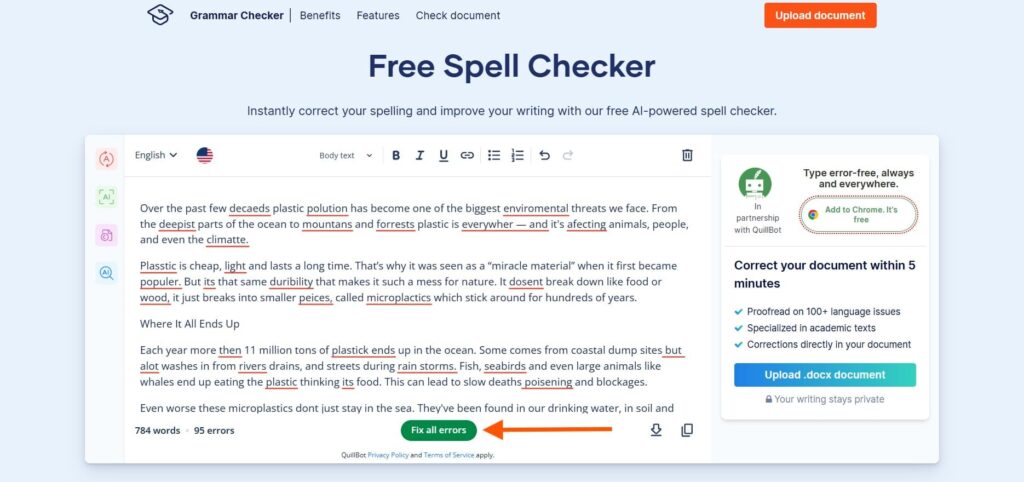
Step 3: It took less than a minute to fix all the wrong spellings.

Scribbr’s AI Text Summarizer was simple and fast. I liked how quickly it gave me a short version of my text.
The built-in formatting tools were also helpful. They made the text look clean and easy to read.
I liked that I could choose the language and type of English, like US or UK. That made it feel more personal and accurate.
The desktop app was a great bonus. It was easy to use and worked well.
I would definitely recommend this tool for quick and easy summaries.
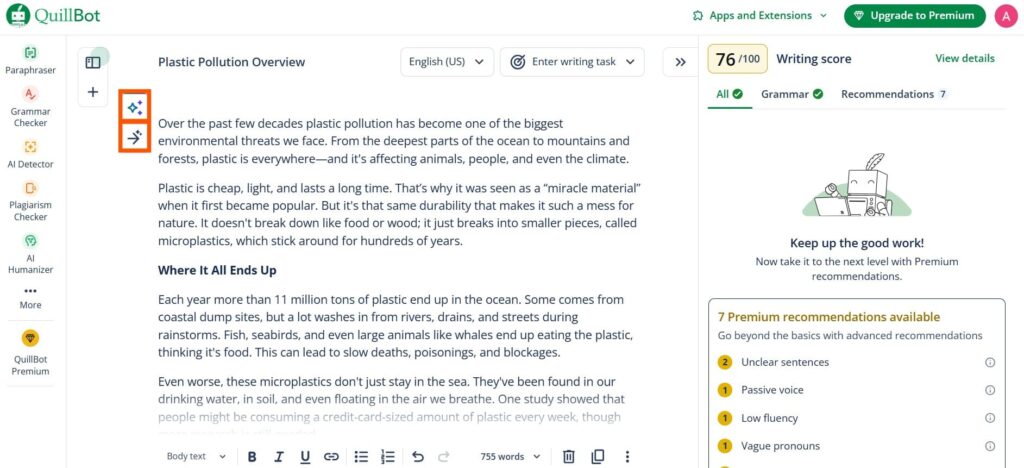
2. QuillBot
With QuillBot, I just pasted the text. Right away, it showed the spelling errors in red. I didn’t even need to click a button.
I saw that QuillBot supports spellcheck in different languages, which was great for my multilingual projects.
The toolbar at the top was pretty cool. I could format the text, add headings, and make things bold or italic with one click.
Then I tried the “AI Commands”. I used them to write more, come up with new ideas, or add a conclusion.
There was also a small arrow button. I clicked it, and it continued writing from where I left off.
It felt like the tool knew exactly what I needed next.
Limitation: None.
This is what I did step by step:
Step 1: I started using the QuillBot AI Spell Checker.
Step 2: I just pasted the text. Immediately, the errors were highlighted in red. I didn’t have to click any button.
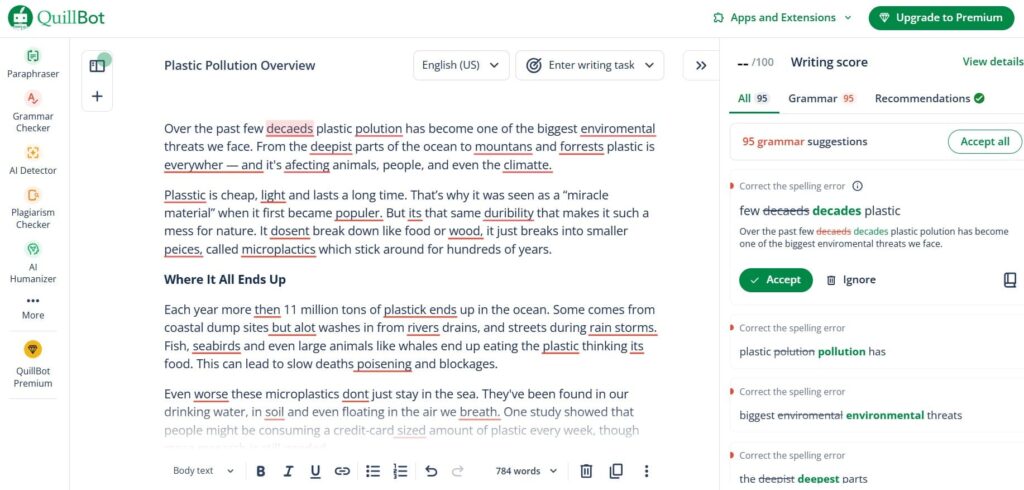
Step 3: I had the option to fix errors one by one by clicking Accept, or fix them all together by clicking Accept all.
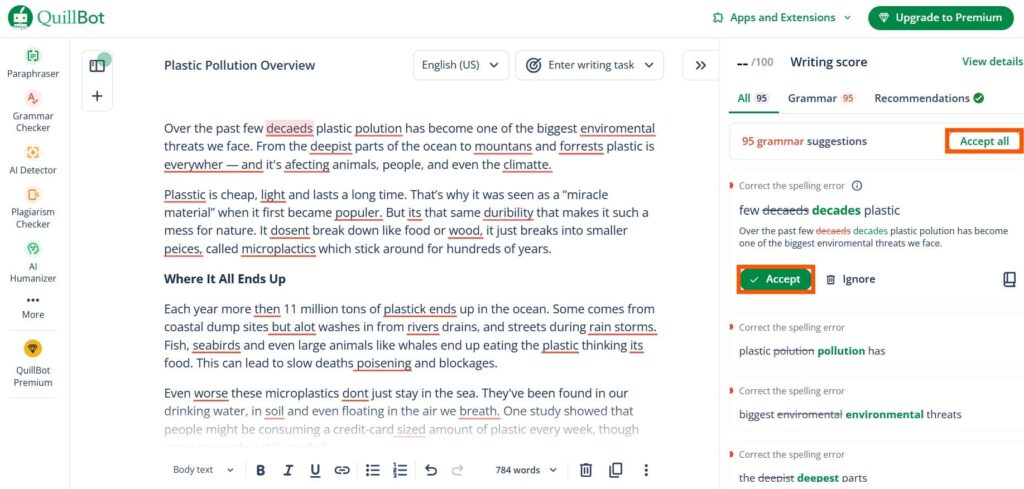
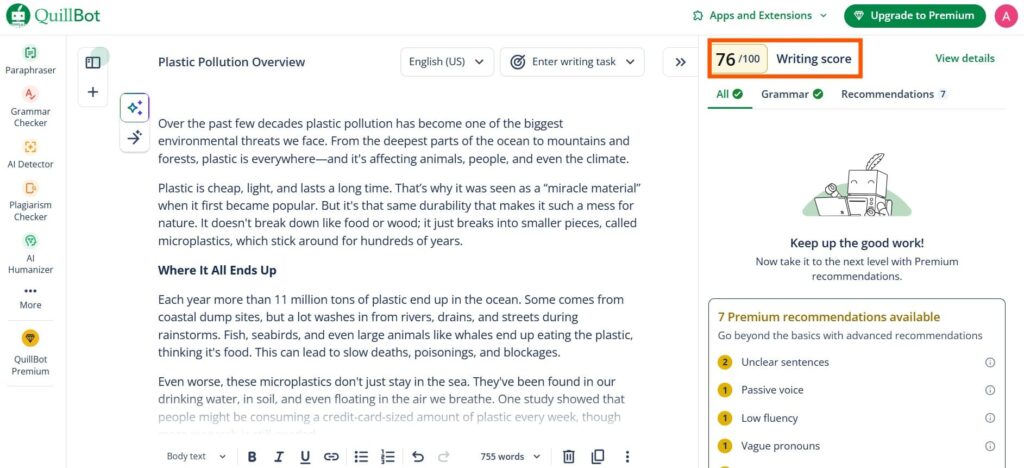
Step 4: I hit the Accept all button, and the result improved the writing score.
Step 5: I clicked on AI Commands to help me write more, generate ideas, present opposing views, or write conclusions.
The button below it, the arrow, allowed me to continue writing from the current paragraph.
QuillBot made writing easy and smooth. I liked how it showed spelling mistakes right away. I didn’t need to click anything extra to see the errors.
It also supported many languages, which was very helpful for my different writing tasks.
The AI Commands feature was great. It helped me add more details or finish my thoughts when I got stuck.
Overall, it felt like the tool understood what I needed. It worked fast and saved me time.
I enjoyed using it and will keep using it for future writing.
3. PaperRater
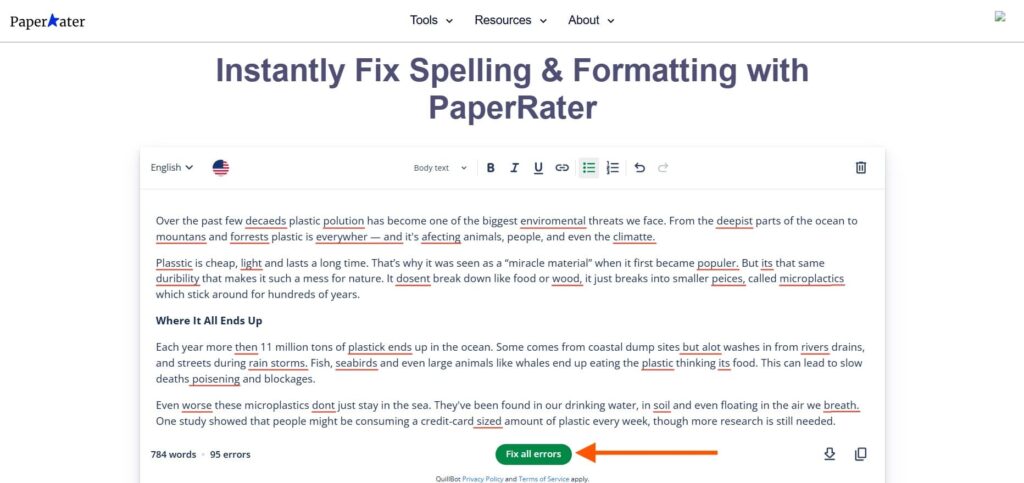
I gave PaperRater a try to check my spelling. I dropped my text into the box, and it got to work right away.
The tool underlined the spelling mistakes instantly. I didn’t have to click anything to get started.
For now, it only supported 3 languages — English, French, and German. Since I was only using English, that didn’t become a problem.
There was a toolbar on top to format the text. If I wanted to change the writing style, I could do that easily.
At the bottom, I saw “Copy” and “Download” buttons, which made saving the work simple.
I liked how fast and direct everything was. No extra steps.
Limitation: None.
This is what I did step by step:
Step 1: I opened PaperRater AI Spell Checker.
Step 2: I dropped the text in the box and let the tool underline the spelling errors.
After that, I clicked the Fix all errors button.
Step 3: The errors were fixed instantly.
If I wanted to change the format of the writing, I could do that too with the toolbar above.
PaperRater started working as soon as I pasted my text. I didn’t need to click anything extra.
The spelling check was fast and easy to understand. It showed the mistakes clearly, so I could fix them quickly.
There were some extra tools like grammar and writing tips. They were helpful, but I didn’t use them much this time.
I didn’t see any word limits or sign-up steps, which was nice.
So far, I haven’t found any problems. It’s a good tool for fast and simple spelling checks.
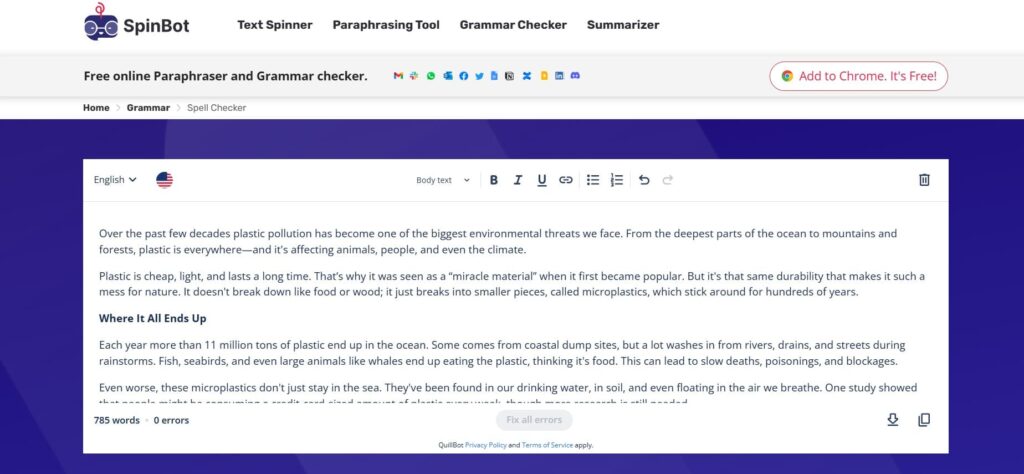
4. SpinBot
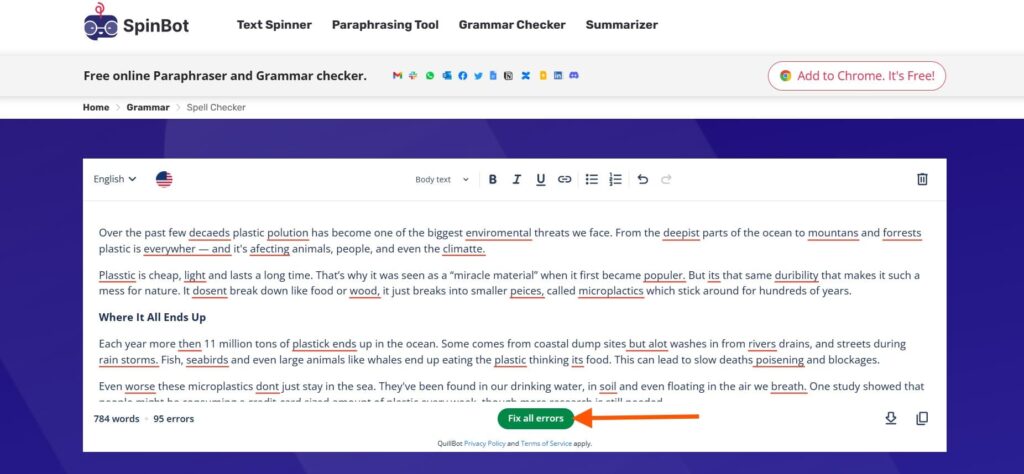
I decided to try out SpinBot AI Spell Checker.
I pasted the whole thing in, and it showed all the mistakes right away.
There was no word limit, which was great. Some tools stop working after a few hundred words, but not this one.
I liked how simple it was. Just one button to fix everything. I didn’t have to go line by line.
I didn’t need to sign up or download anything. I could download the Chrome extension and use it on my browser.
Limitation: None.
This is what I did step by step:
Step 1: I launched SpinBot AI Spell Checker.
Step 2: I pasted the text in the box and let the tool identify the errors.
Then, clicked on the Fix all errors button.
Step 3: The result was pretty clean. It only took a few seconds to fix all the errors.
SpinBot AI Spell Checker is fast, simple, and free. I didn’t need to sign up or make an account. That saved me time and effort.
It checked my text quickly and fixed everything in just a few seconds. The tool was easy to use and didn’t confuse me.
There were no word limits, which I really liked. I could paste as much text as I wanted.
There were also no ads or pop-ups. That made the experience even better.
I’ll definitely keep using it for quick spelling and grammar checks.
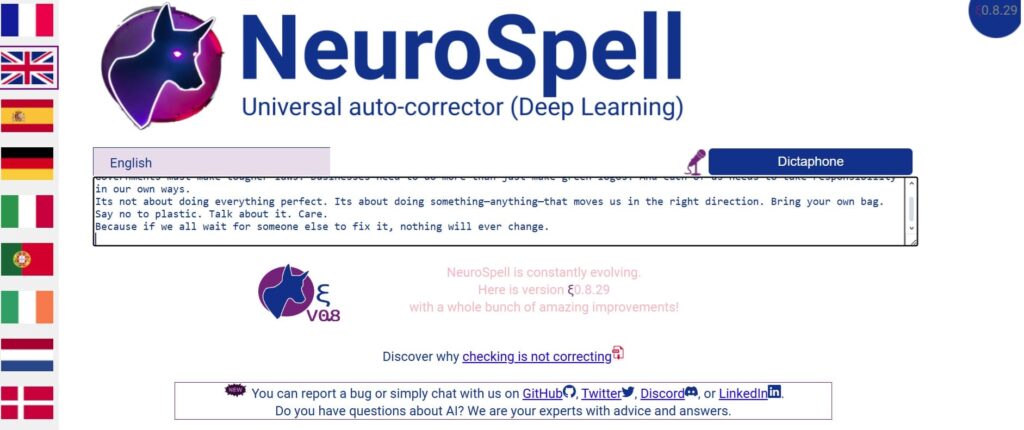
5. NeuroSpell
This time, I tried NeuroSpell AI Spell Checker.
As usual, I dropped the text in the box. I didn’t even have to press a button. It started checking the spelling right away.
The tool corrected the mistakes and made the changes bold, so I could see what was fixed.
Then I found something new.
There was a “Dictaphone” option. I could speak into it, and the tool would fix the spellings from my voice.
It was fun to try. It even showed a written version of what I said.
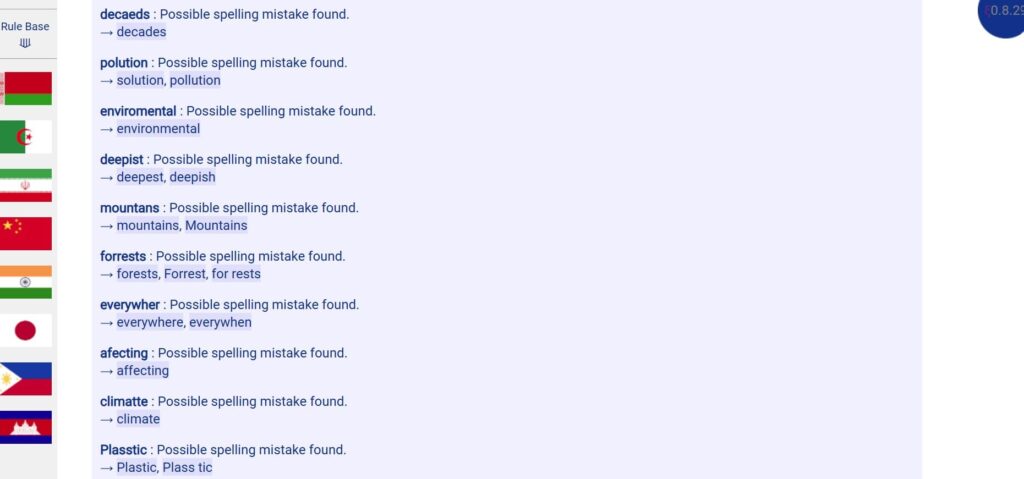
Below the results, I saw a small explanation for each correction. That made learning easier.
Limitation: None.
This is what I did step by step:
Step 1: I accessed NeuroSpell AI Spell Checker.
Step 2: As usual, I dropped the text in the box. I didn’t have to click any button.
Step 3: The tool checked the spelling and corrected them.
The corrected words were highlighted in bold.
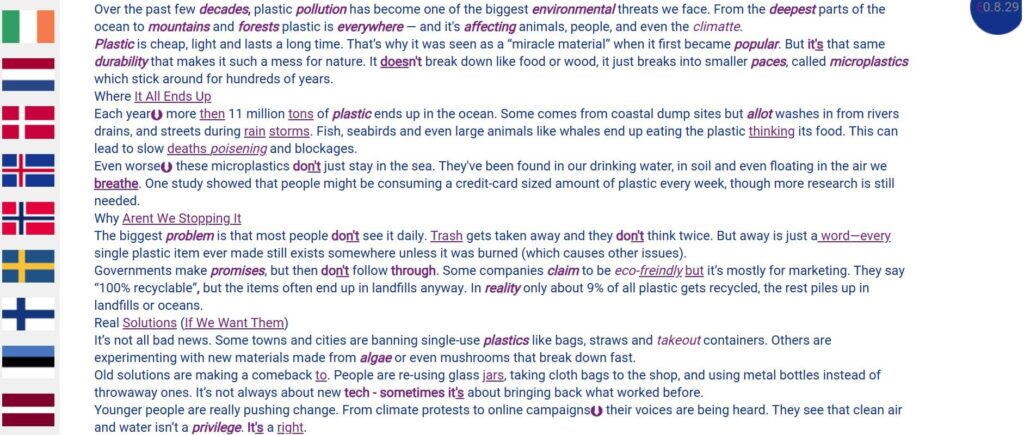
Step 4: At the bottom, there was an explanation of the wrong word and the corrected ones.
I liked how simple NeuroSpell was. The design was clean, and everything was easy to understand.
The voice option was fun to use. I spoke into the mic, and the tool wrote the words for me. Then I could check and fix any mistakes.
I didn’t face any problems while using it. There were no ads to bother me. I didn’t need to sign up or make an account.
There were also no word limits, which was great. Overall, it’s a smooth and useful tool for fast checks.
6. Wordvice
I tried Wordvice for this blog.
First, I pasted my writing into the tool. But I had to log in with my Google account to use it.
After logging in, my text disappeared, so I had to paste it again. That was a bit annoying.
But I liked that it supports many languages. I could also choose a document type like Academic, Business, or Creative.
There were 4 modes: Light, Standard, Intensive, and Concise. Only 2 of them were free. The others needed an upgrade.
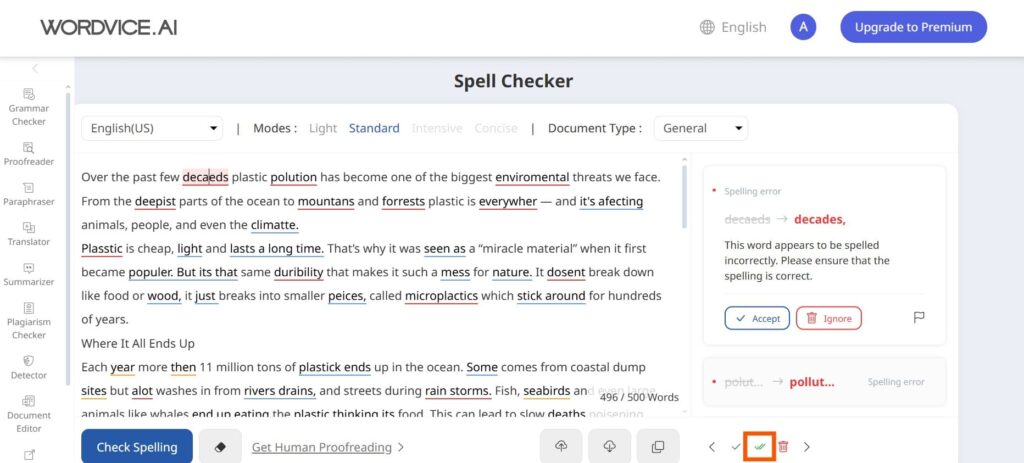
I saw a “double tick” icon, which worked as the fix-all button. One click fixed all mistakes, which I enjoyed.
Limitation: 500-word limit.
This is what I did step by step:
Step 1: I opened Wordvice AI Spell Checker.
Step 2: Without further ado, I inserted the text and hit the Check Spelling button.

Step 3: The errors were immediately highlighted in red.
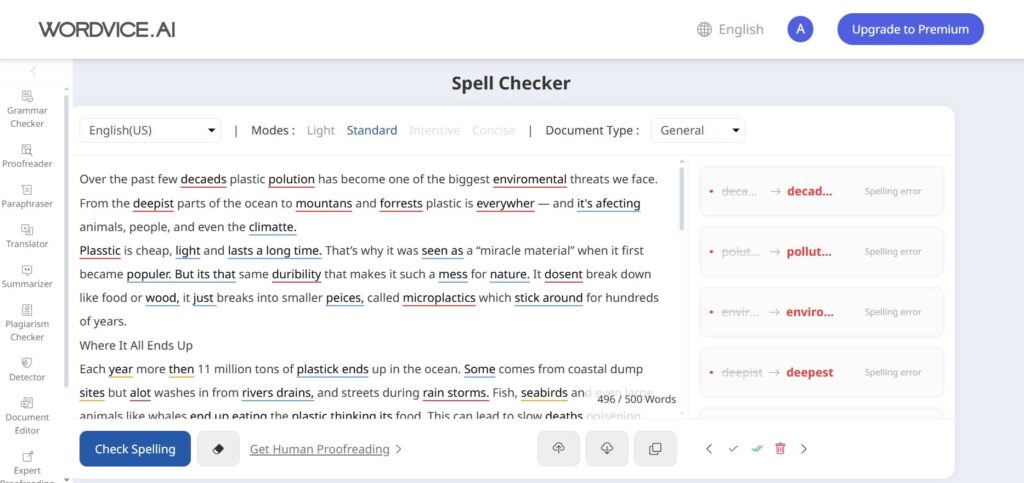
Step 4: If I clicked on the wrong word, a suggestion appeared on the right side. If I agreed with the suggestion, I clicked Accept. If not, I clicked Ignore.
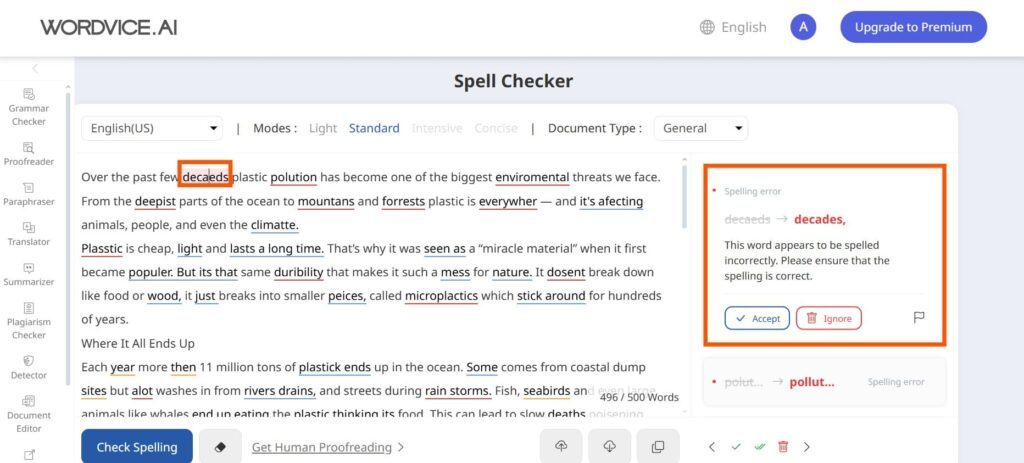
Step 5: Another way was to click the Double-click button to fix all the errors at once.
Wordvice was easy to use, but logging in took extra time. I also didn’t like pasting my text twice to start the check. It made the process feel slower.
Still, I liked the language support. It works with many languages, which is useful. I also liked that you can choose different document types, like essays or emails.
The fix-all button was a big help and saved time. But the 500-word limit felt too small for longer texts.
Overall, it’s a good tool for quick and simple checks.
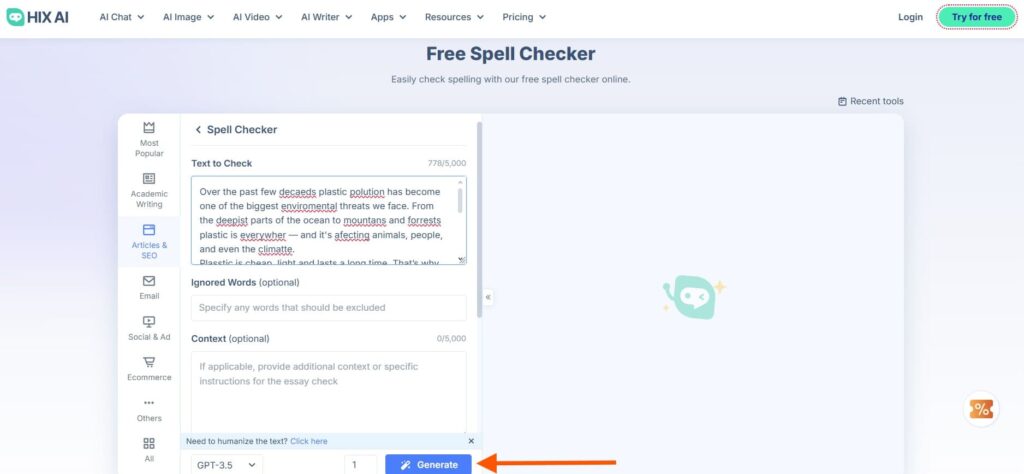
7. Hix
I tried Hix AI Spell Checker with a long text.
But the tool only supported 150 words at a time. So, I had to split the text into smaller parts.
Still, the tool corrected all the mistakes in each section. I didn’t have to fix anything myself. So I was glad.
Luckily, there was a ‘Bypass AI’ option, which could save my neck if I were dealing with an academic paper.
Features I liked the most were the “Ignored Words” and the “Context” option. I could write down the words the tool should ignore and even give it a context for the output.
Overall, the tool was great, but the word limit was too low for long texts.
Limitation: Restricted to 150 words.
This is what I did step by step:
Step 1: I launched Hix AI Spell Checker.
Step 2: I split a 784-word text into sections of fewer than 150 words to run it through this tool.
Step 3: I was glad the output fixed all the mistakes, so I didn’t have to fix the errors one by one.
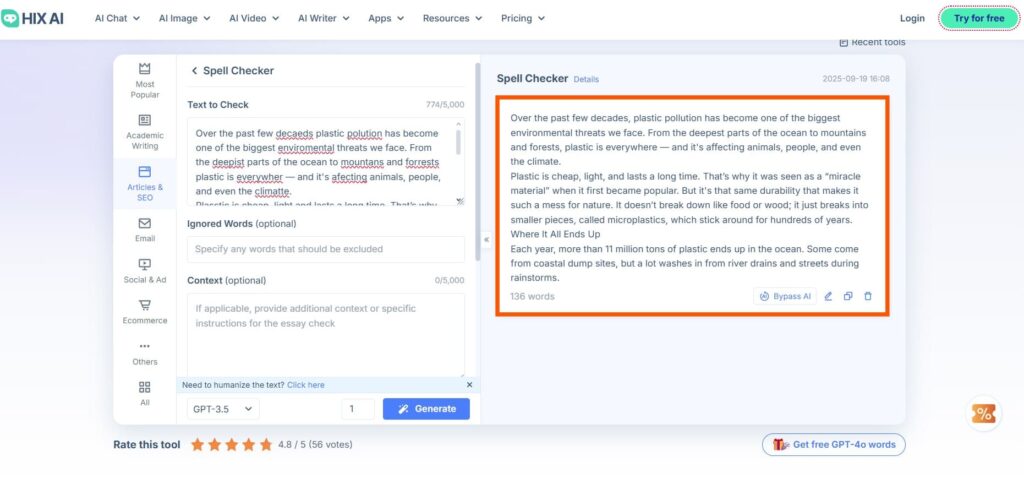
Hix AI Spell Checker worked well for me. It caught all my spelling and grammar mistakes.
I liked the “Ignored Words” and “Context” features. They helped make the corrections more accurate.
The AI Detector was also a nice bonus. It showed that my text looked like it was written by an AI.
But the 150-word limit was too small. It made it hard to check long texts without splitting them.
Overall, it’s a smart tool with cool features, but it’s better for short texts or quick checks.
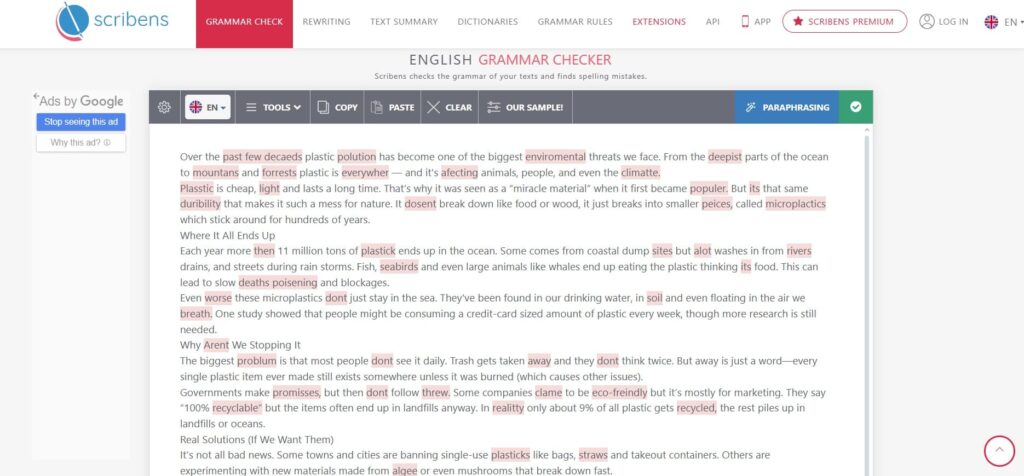
8. Scribens
I used Scribens AI Spell Checker for this blog.
Although it supported many languages, I stuck with English.
Besides, I liked that I could export, print, or even share the final version.
There was also a sample text to test the tool, but I skipped that. I already had my own text to check.
While using it, I saw a “Paraphrase” button. I didn’t need that feature. But I appreciated the integrated AI Paraphraser.
The tool highlighted errors, and I had to click each one to see the correction. It worked, but fixing things one by one took time.
This tool is useful, but not ideal if you’re in a hurry.
Limitation: No “fix-all” button.
This is what I did step by step:
Step 1: I visited Scribens AI Spell Checker.
Step 2: I inserted the text in the box and let the tool work its magic.
Step 3: After I clicked on the highlighted word, the correct suggestion would appear.
I just selected that. That’s all.
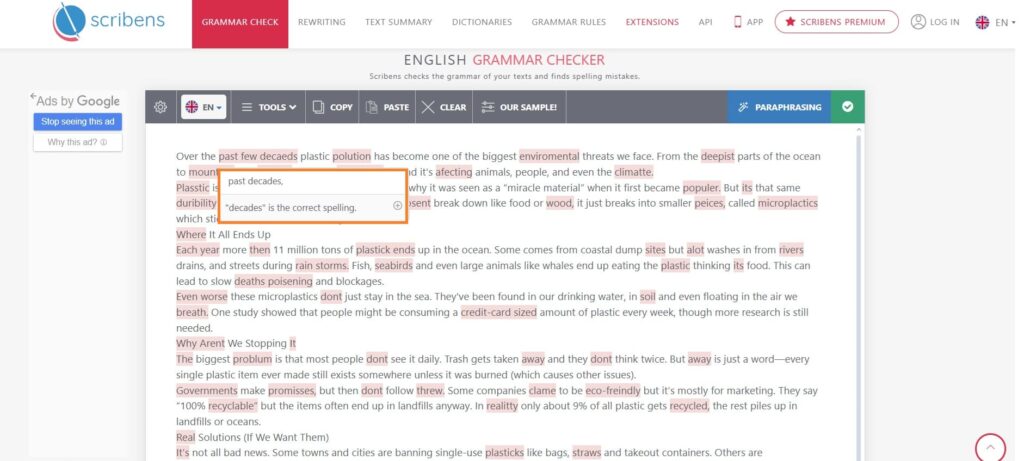
Scribens was like most other spell checkers I tried. It worked well and found many mistakes in my writing.
I really liked the export and share options. They made it easy to save and send my text after checking.
But fixing each error one by one took a long time. There was no quick way to fix everything at once.
So, in my opinion, Scribens is not the best choice if you are in a hurry.
It works better when you have time to fix errors slowly.
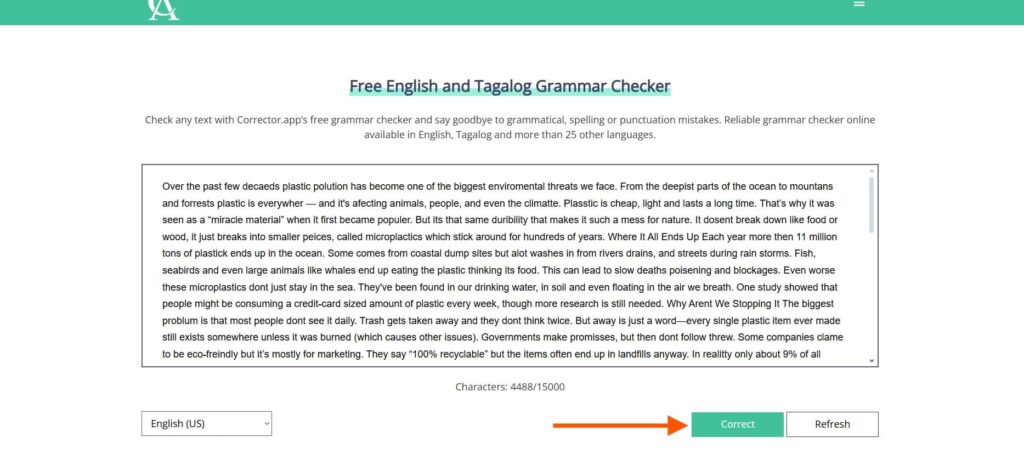
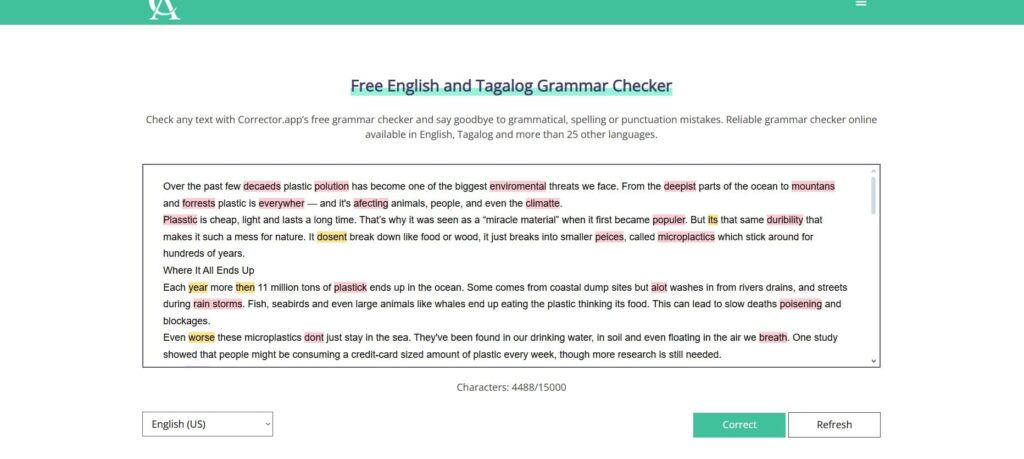
9. Corrector
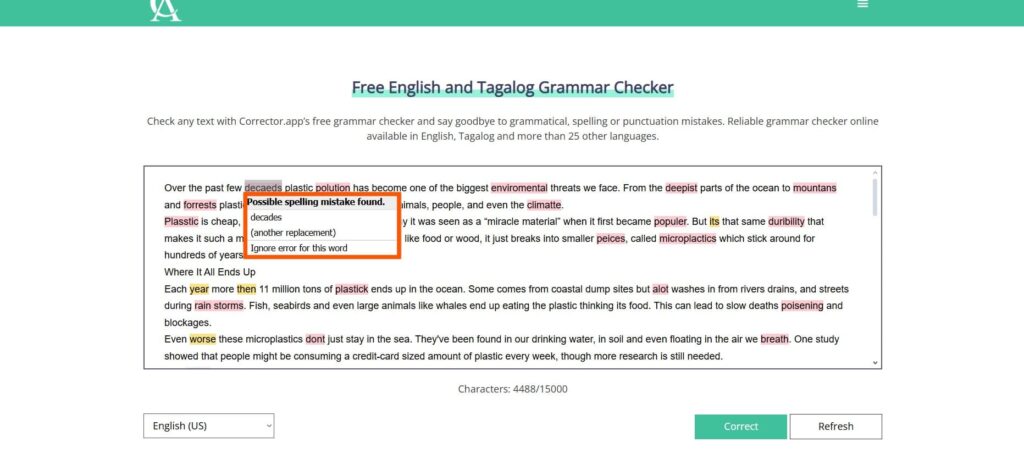
I stumbled upon Corrector AI Spell Checker while writing this blog.
Wrong words were marked in red. I clicked on a red word, and the correct spelling popped up.
One more click, and it was fixed. If I didn’t agree, I just clicked “Ignore error for this word.”
I saw that it supports many languages, but I only used English. The list of supported languages was long, which could be useful later.
There was a limit of 15,000 characters, which was plenty in my opinion.
Limitation: No “fix-all” button.
This is what I did step by step:
Step 1: I opened the Corrector AI Spell Checker.
Step 2: I inserted the text into the box and clicked the Correct button.
Step 3: The incorrect words were highlighted in red.
Step 4: Once I clicked on the highlighted word, the correct suggestion showed up.
I just had to click on the correct spelling. If I disagreed, I had to click Ignore error for this word.
This tool said it supports over 25 languages, and it really did. I could check my text in many different languages, which was helpful.
I didn’t need to sign up or download anything to use it. That made it very easy and quick to start.
But I had to fix each error one by one. This took more time than I wanted.
I wish the developer would add a “fix all” button. That would make fixing mistakes much faster and easier.
Still, it is good for language support.
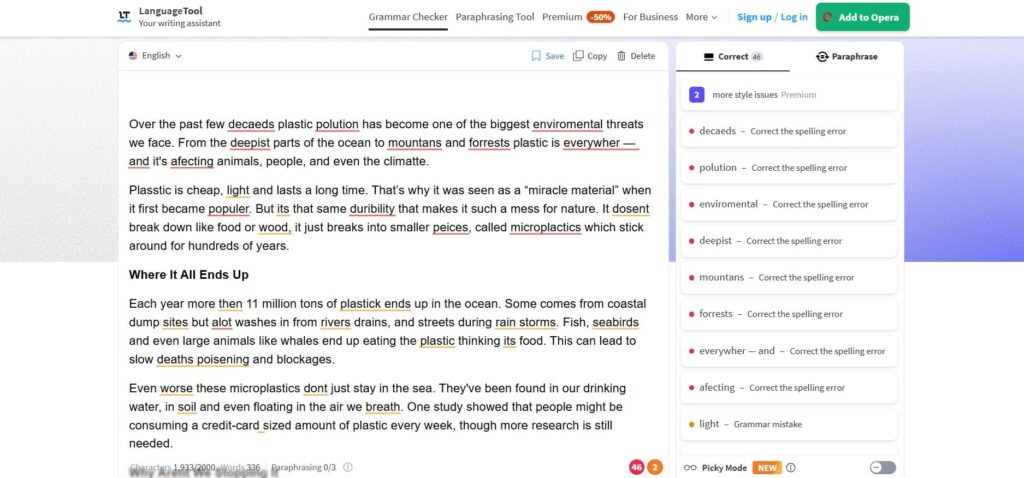
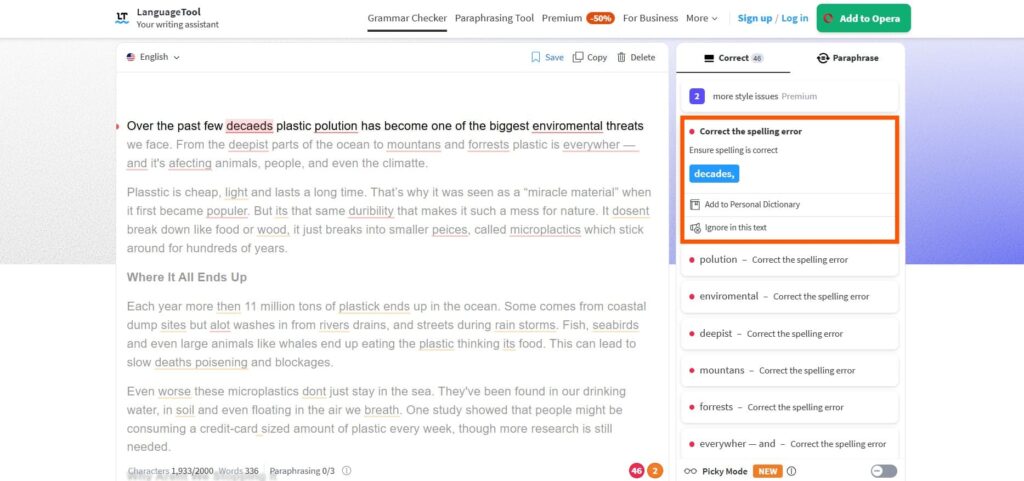
10. LanguageTool
I discovered LanguageTool when I needed quick help checking my writing.
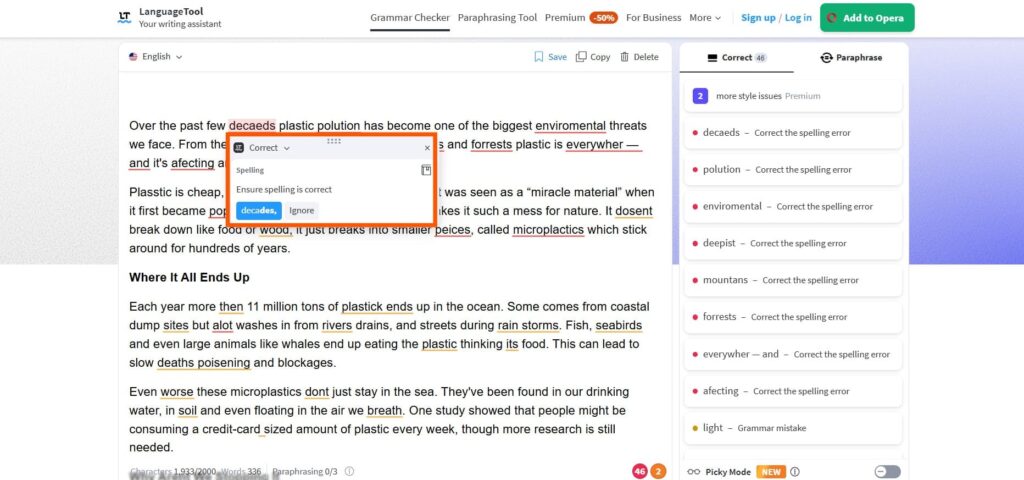
All I had to do was paste the text into the editor. In seconds, it underlined the mistakes.
I clicked on the underlined words to see suggestions. Sometimes, I used the right-side panel to make fixes.
I liked how clean the interface was. It didn’t feel overwhelming. But there are a few downsides.
There’s a 2000-character limit, so I had to break my text into smaller parts.
Also, there’s no “fix-all” button to save time.
Still, it helped me write better. So, I go back to it often.
Limitation: Restricted to 2000 characters. No “fix-all” button.
This is what I did step by step:
Step 1: I tried out the LanguageTool Spell Checker.
Step 2: All I had to do was paste the text and wait for the tool to highlight the errors.
Step 3: I could either click on the underlined word and choose the correct option.
Step 4: Or click on the word in the right side panel and fix it.
To put it simply, I liked how fast this tool found mistakes in my text. It helped me fix spelling errors quickly and easily.
However, it has a limit of 2000 characters, which is quite short for longer texts. Also, there is no “fix-all” button, so I had to fix errors one by one.
Still, it works well for checking short texts fast.
It’s a good choice for quick edits.
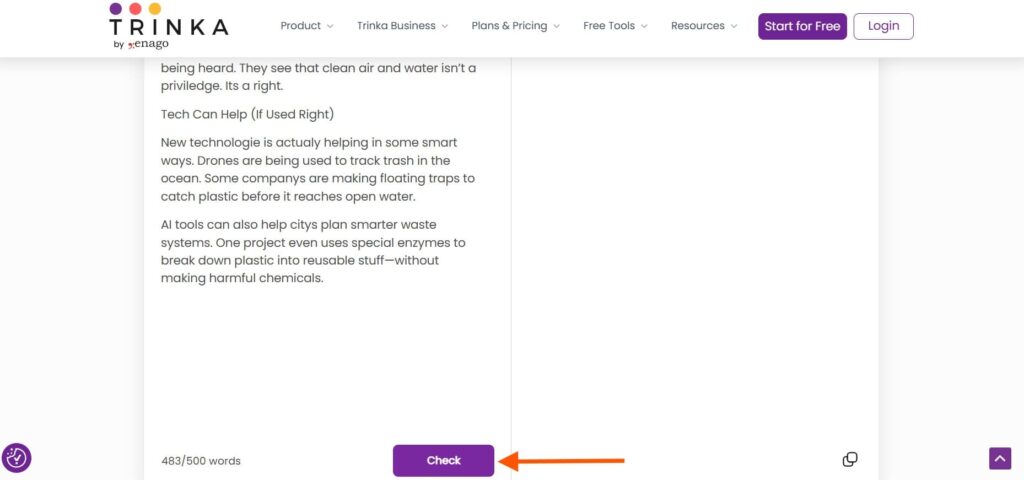
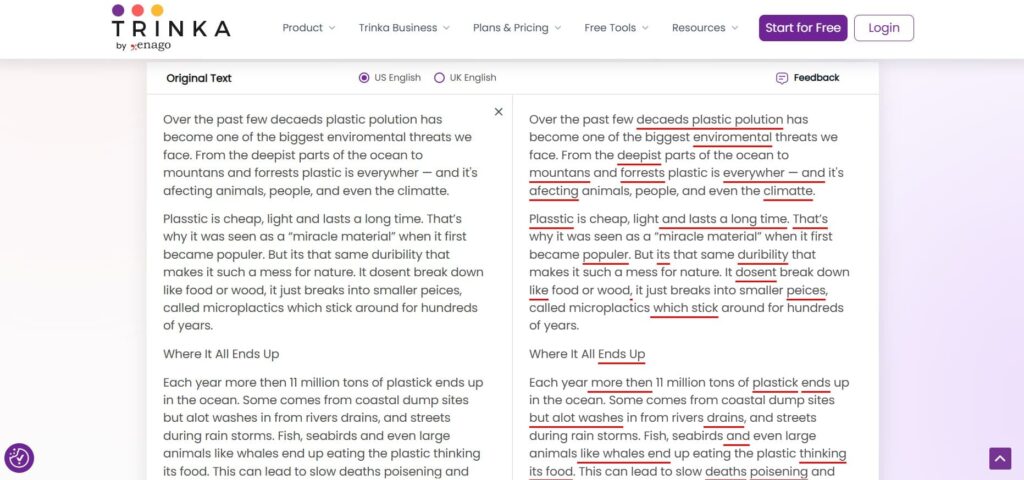
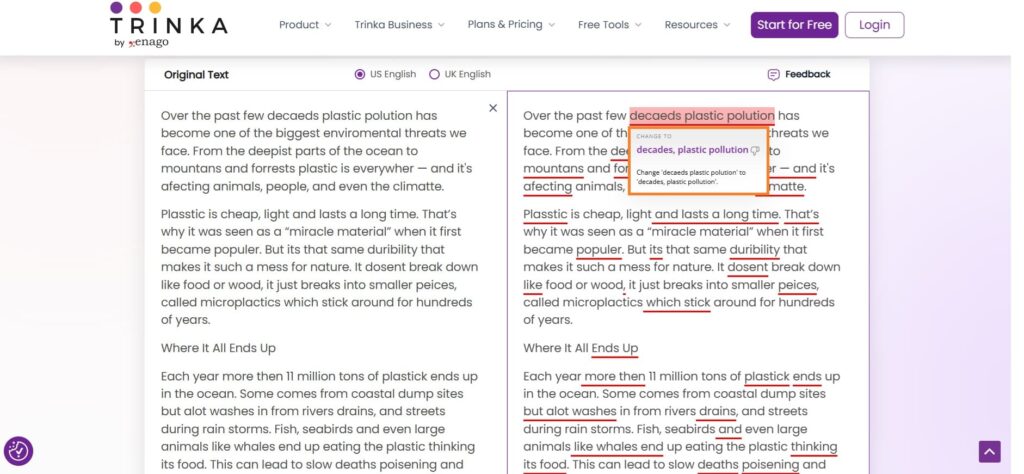
11. Trinka
I gave Trinka a try to check one of my longer texts.
First thing I noticed — it only supports US and UK English. Not many choices.
The word limit was also short, just 500 words. So I had to break my text into smaller pieces.
Once the tool found mistakes, I kept clicking and fixing, one by one. It felt tiring after a while.
I wanted more options or features, but there weren’t any. Still, it did catch some errors.
For small writing tasks, it’s okay. But for big projects, it needs more power.
Limitation: 500-word limit.
This is what I did step by step:
Step 1: I visited Trinka AI Spell Checker.
Step 2: I copied and pasted the text. Then, hit the Check button.
Step 3: The errors were underlined immediately.
Step 4: I had to click on each error and fix it manually. That took a long time.
Trinka worked okay for short texts. It found some mistakes, but I had to fix each one by hand. That took a lot of time.
The 500-word limit felt small. I wanted to check longer texts without breaking them into parts.
It only supported US and UK English, which was a bit limiting.
For quick checks, it does the job. But for longer writing or more features, I would try a different tool.
Overall, it’s good for simple, short edits.
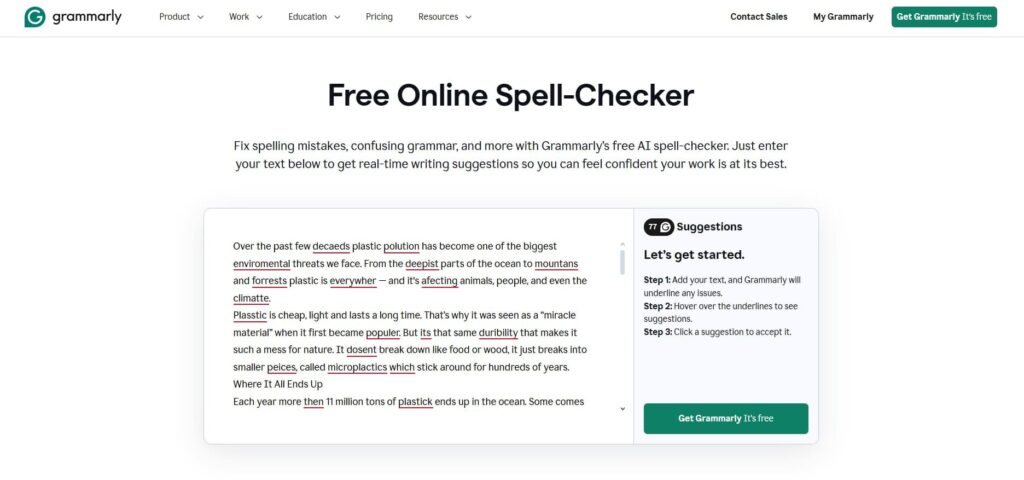
12. Grammarly
Grammarly’s spell checker was as simple as it could get.
I pasted the text, and right away, it highlighted all the wrong words. I didn’t have to press any extra buttons to start.
Each mistake was underlined. When I clicked on a word, a small pop-up showed me the suggested correction. If I liked it, I hit “Accept”. If not, I clicked “Dismiss”.
I could go word by word and fix each error, but it took some time. I kept wishing there was a “fix all” button to save a few clicks.
Still, the tool worked well and helped me fix all the errors.
Limitation: No “fix all” button.
This is what I did step by step:
Step 1: I launched the Grammarly Spell Checker.
Step 2: After pasting the text, the tool automatically highlighted all the wrong words.
Step 3: Once I clicked on a highlighted word, a pop-up opened.
If I agreed with the suggested correction, I would just select the Accept button.
Otherwise, I would click on Dismiss.

Grammarly was simple to use. I just pasted my text, and it started checking right away.
It showed mistakes clearly. I clicked on a word, saw the suggestion, and picked to accept or skip it.
Fixing each word one by one took some time, though. There wasn’t a “fix all” button to speed things up.
Even so, Grammarly helped me catch and correct almost every error. It made my writing much better.
I liked that it gave extra tips on grammar and style, too.
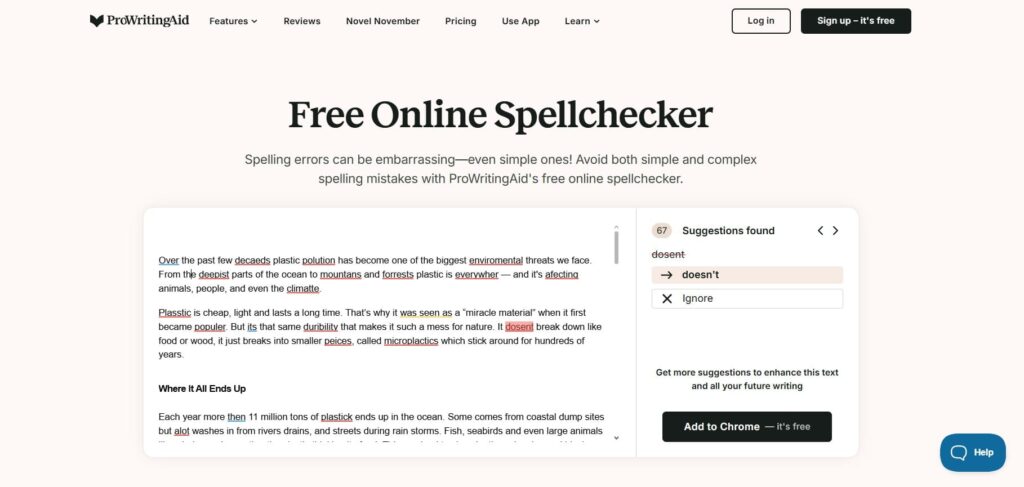
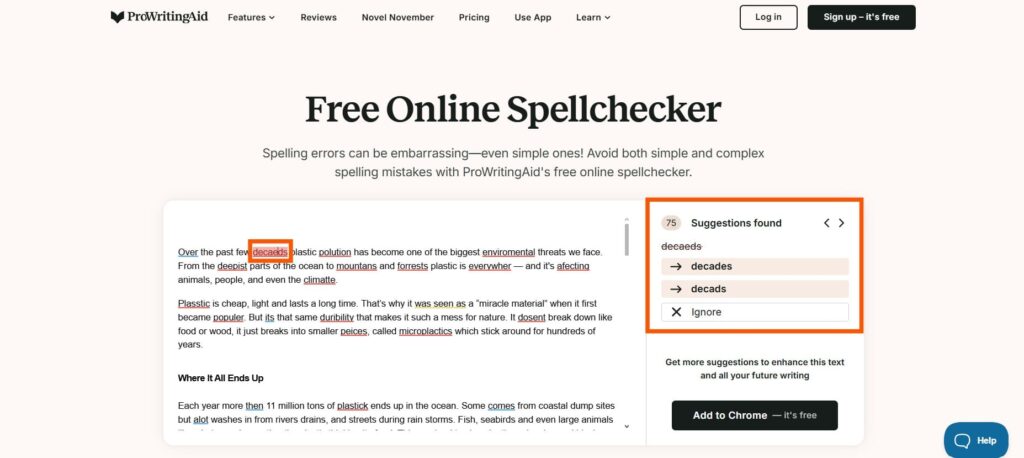
13. ProWritingAid
ProWritingAid is another tool that I experimented with for this blog. The beginning was simple, like the other tools.
I started by pasting the text in the box. When I clicked on an error word, a pop-up appeared on the right.
It gave me a few suggestions. I had to pick the right one myself. The tool didn’t fix anything on its own.
Clicking each error one by one took a while. It felt a bit slow for longer texts.
I like the Google Chrome extension, though.
Limitation: No “fix-all” button.
This is what I did step by step:
Step 1: I launched ProWritingAid AI Spell Checker.
Step 2: As usual, I started by pasting the text in the box.
Step 3: When I clicked on an error word, a pop-up appeared on the right.
I just chose the word that was correct. So, I had to make the judgment, instead of the tool doing that by itself.
With ProWritingAid, the interface was clear, so I didn’t get confused.
But I did notice some problems. I had to fix every error by hand. That took a lot of time.
The suggestions were helpful and made my writing better. But there was no quick “fix all” option.
If you want to fix mistakes fast, this might not be the best tool.
Still, it works well if you want detailed help and don’t mind spending extra time.
14. Sapling
I tried Sapling to check my writing, and it felt smooth right away. I didn’t need to click any button to start.
As soon as I pasted my text, the tool underlined the mistakes.
I clicked on the wrong word, and a small box showed the right option. I clicked again to fix it.
I also liked seeing the word count and error count on the screen. That helped me track my progress.
There was a small toolbar to format the text. That was a nice touch.
The only issue I found was the missing “fix-all” button. I had to fix every error one by one.
It worked well overall, but a single-click fix for all errors would make it even better.
Limitation: No “fix-all” button. No language option.
This is what I did step by step:
Step 1: I launched Sapling AI Spell Checker.
Step 2: As soon as I input the text, the errors were underlined instantly.

Step 3: I just clicked on the wrong word, and a suggestion box popped out. I just click on the correct suggestion.
Step 4: I could also see the word count and error count.
I liked how Sapling showed mistakes right away. I didn’t have to wait long to see what was wrong.
Fixing errors was simple. The tool made it easy to click and fix each mistake. The word and error count helped me keep track of my progress.
I just wish it had a “fix-all” button. That would save even more time. Still, Sapling is a good tool for quick edits and catching errors fast.
It works well if you want to clean up your writing without much hassle.
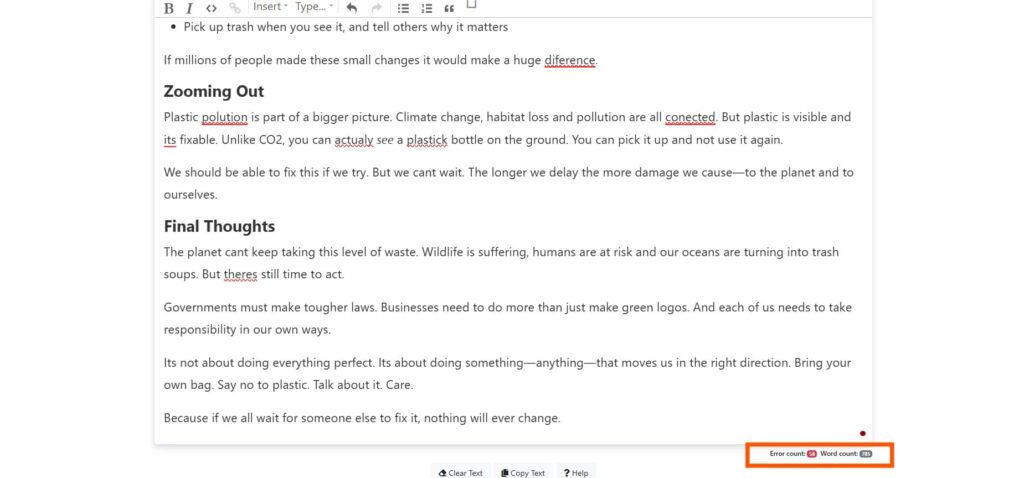
15. ZeroGPT
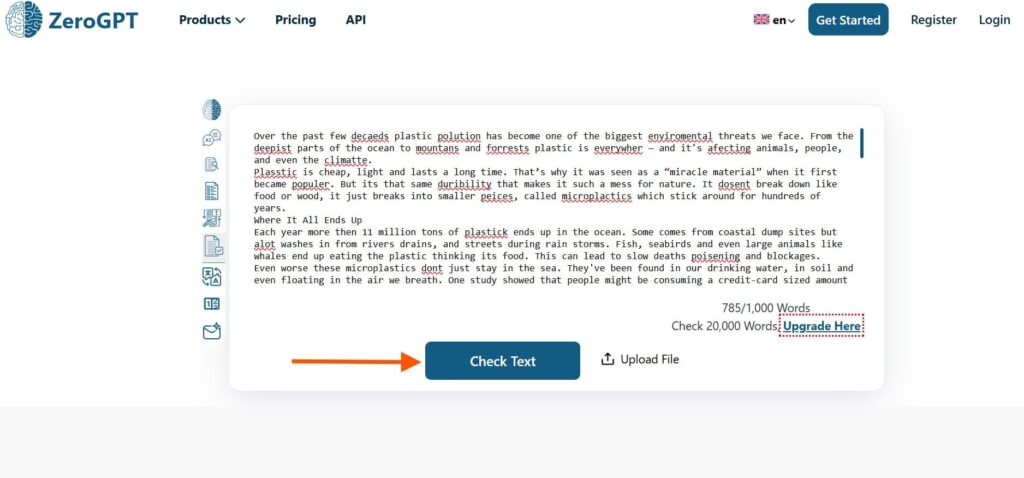
This time, I tried ZeroGPT. I pasted my text directly into the box, but I could also upload a file.
There was a 1000-word limit, but that was fine for me. If I needed more, I could upgrade and check up to 20,000 words.
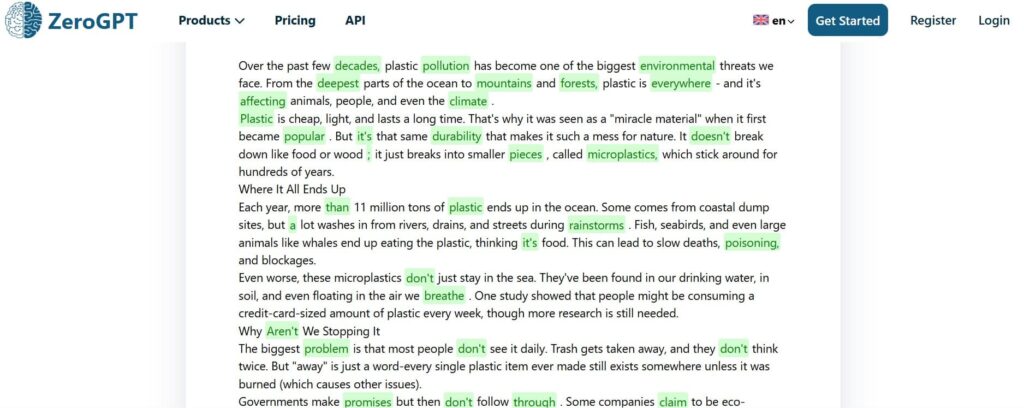
The tool highlighted my corrected words in green. It helped me spot my mistakes easily.
I clicked the “Statistics” button to see a full summary. It showed word count, reading level, speaking time, and more.
There was also a paraphrase option at the bottom. But it only worked for 300 words, so I skipped it.
Limitation: No language option.
This is what I did step by step:
Step 1: I accessed the ZeroGPT AI Spell Checker.
Step 2: I pasted the text in the box, and the tool automatically highlighted the errors.
I clicked the Check Text button to fix them all at once.
Step 3: I liked that ZeroGPT highlighted the corrected words in green.
Made it easier to understand my mistakes.
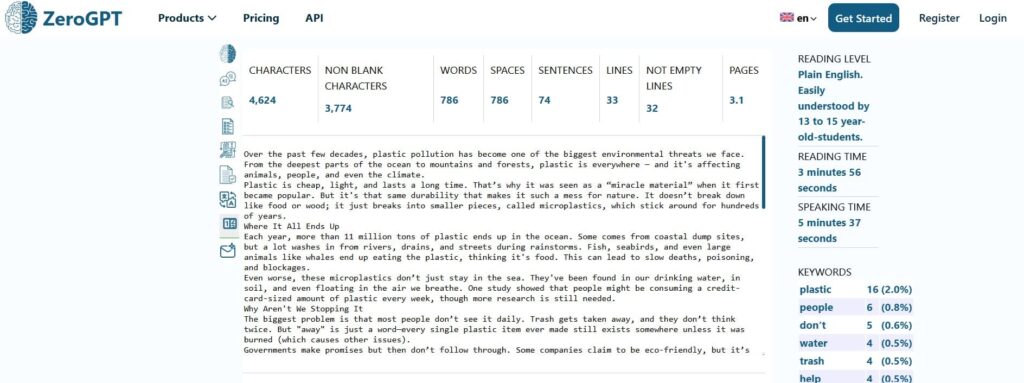
Step 4: I clicked on the Statistics button.
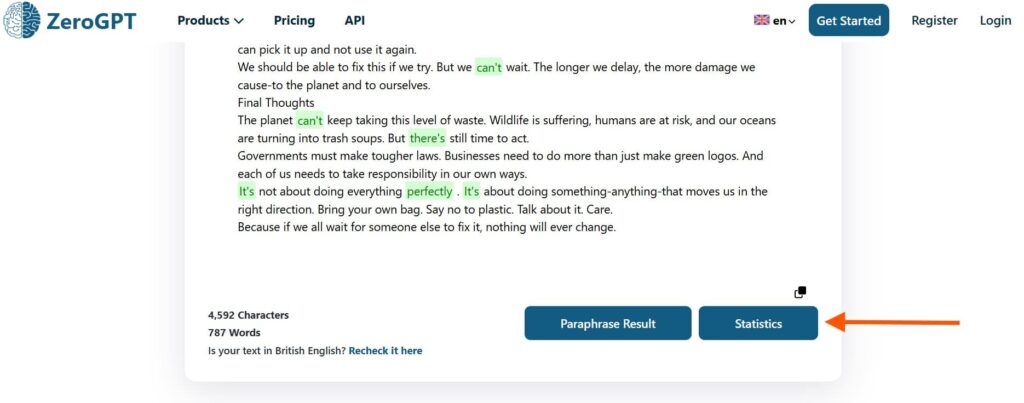
Step 5: It showed a summary of the number of characters, words, spaces, sentences, lines, reading level, reading time, speaking time, and keywords.
ZeroGPT was easy to use. The screen was clear and simple. I didn’t have to spend time learning it.
I liked the green highlights. They showed my mistakes clearly. It was easy to fix them fast.
The “Statistics” feature was helpful. It gave me info about my text, like word count and reading level. That helped me see how good my writing was.
The only thing missing was a language option. It would be nice to check other languages too.
FAQs
Can I Use an AI Spell Checker for Any Kind of Writing?
Yes. You can use it for essays, emails, blog posts, reports, social media or even business documents. But for technical or highly specialized writing, double-check suggestions.
Are AI Spell Checkers Always Accurate?
No. They are very good but not perfect. Sometimes they miss errors or make wrong suggestions. They may struggle with slang, rare words, or errors needing deep understanding.
Do AI Spell Checkers Work for Other Languages?
Many do. They support multiple languages and dialects. But accuracy can vary. Less common languages might not be as well-trained.
Can AI Spell Checkers Fix Grammar or Style?
Many AI spell checkers also offer grammar fixes, style suggestions, tone/formality tweaks, and even writing flow improvements. They make your writing smoother and more professional.
Are AI Spell Checkers Free?
Many tools give free versions. Free versions may limit the number of words checked, features, or output suggestions. Premium or paid versions often unlock more words, better accuracy, and more correction types.
What Should I Do if I Don’t Agree with a Suggestion?
Review it carefully. AI sometimes misinterprets your meaning. If something feels wrong, you can ignore that suggestion or edit manually. Check with other tools or search engines to confirm.
Bottom Line
Testing all these spell checkers showed me just how different each tool can be.
Some caught simple mistakes fast, while others helped improve grammar, tone, and style.
The key is finding the one that matches your needs and writing style.
Try a few from this list and see which feels right for you. Once you find your match, your writing will improve, and you’ll save time every time you write.
Don’t wait. Start writing smarter today!